|
|
Devices << ZWaveDevices | Software Overview | Sitemap | Downloads | Developers | Forums |
|
|
Devices << ZWaveDevices | Software Overview | Sitemap | Downloads | Developers | Forums |
|
|
Z-Wave DevicesZ-Wave devices are wireless devices popularly used in home automation systems. Common Z-Wave devices are wall switches, wall outlets, dimming and switching modules, motion, door and window sensors, and smart thermostats. Z-Wave devices are available on the web, and we have also found them in retail stores (Lowes, Home Depot, Radio Shack). 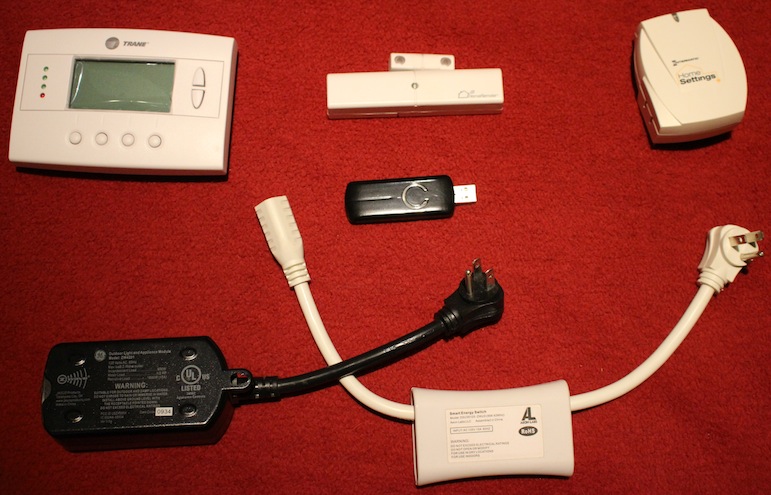
The Z-Wave technology was developed by a company called Zensys. The technology was later acquired by Sigma Designs. The technology is closed, meaning that the hardware and software specifications are not freely available. There are some projects available on the web which have re-engineered the software interface and are freely available on the web. We found one of the most helpful resources to be the open-zwave project at http://code.google.com/p/open-zwave. Z-Wave radios have a reach of about 100 feet or less indoors (depending on obstacles). However, Z-Wave is a mesh network, meaning Z-Wave messages can be relayed from device to device, allowing much longer distances. Getting StartedZ-Wave systems start with a special device called a serial controller. The controller "includes" other devices into the system and plugs into the Virtual Wiring system host. When plugged into the host, the controller monitors and controls the Z-Wave system. There are several controllers available which should all be interchangeable. We have done all our testing with the Z-Stick controller made by Aeon Labs, so we don't know how well other controllers will perform. The Z-Stick is a USB device with an internal battery. The battery allows the Z-Stick to be removed and moved from Z-Wave device to Z-Wave device during inclusion. Typically, inclusion requires that the controller be within a few feet of the device being included, so being able to move the Z-Stick to each device during inclusion makes the job much simpler. The Z-Stick is available on the web. 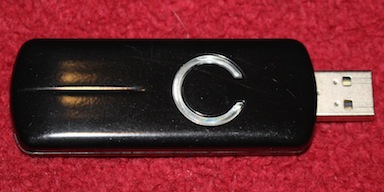
To set up a Z-Wave system, purchase a controller (Z-Stick is recommended), and the Z-Wave devices you are interested in. Generally, we have found that the basic dimmer and simple switch devices (wall switches, outlets, appliance modules, door and window sensors) work well. As the devices become more complex, they start to diverge, with each manufacturer making a unique device that requires special coding and configuration. In some cases, the more complex devices have many different versions, some with bugs and unexpected behaviors. Before buying one of the more complex Z-Wave devices, it's a good idea to read other people's comments and recommendations (Amazon.com is a good resource). Including DevicesOnce you have purchased your controller and devices, you need to "include" each device into the system. Inclusion is initiated by putting your controller into include mode. The Z-Stick goes into include mode when you unplug it from its USB port and press its one button briefly. You can tell the Z-Stick is in inclusion mode by observing its slowly flashing blue light (flashes about once a second). Put the controller into inclusion mode, and bring it to each Z-Wave device. The devices should be in their final installation locations. If, instead, you bring devices to the controller, the devices will be included, but the devices will not learn who their Z-Wave neighbors are and will not be able to relay messages to their neighbors. The devices have an include button (see their documentation for specifics), which you push when the controller is in include mode and it is near. The Z-Stick will give a quick set flashes to indicate when it has included a device. During inclusion, remember the order you include your devices (as this information will be useful when configuring the Virtual Wiring system). If you don't want to remember your inclusion order, include and configure the system one device at a time. Include each device, and when you are done, take the controller out of include mode (for the Z-Stick, press its one button briefly, and its light will stop flashing). Plug the Z-Wave controller into a USB port on your host system and you are ready to configure your Virtual Wiring system. Z-Wave Device InstallationTo use a device in the Virtual Wiring system, it must be installed. Begin by installing the Z-Wave Serial Controller. Once the controller is installed, you can install the other devices. As you successfully install your Z-Wave Devices, it's a good idea to copy the installation commands from the Console into a Script. Once the commands are Scripted, you can run them by just clicking on the Script. If you choose, you can put the commands into your startup Script, so they are run each time your start or restart the system. Z-Wave AddressesTo install a non-controller device, you need a parameter called the Z-Wave "address". The address uniquely identifies the device in a Z-Wave network. During device inclusion, devices are assigned one of over 200 Z-Wave addresses by the Z-Wave controller. The Z-Wave controller reserves address 1 for itself. In a fresh system, you can usually know your Z-Wave device addresses by remembering the order you installed your devices. The first included device is usually address 2, the next is address 3, etc. If your first address is higher than 2 or you aren't sure, you can always create a fresh system by unincluding all your devices and hard resetting your Serial Controller. When you aren't sure what address has been assigned to a device, you will need to ask the system. After you have included your new device, query the Serial Controller for the included devices' addresses. You will be presented with a list of Z-Wave addresses. The new address is the address of the newly installed device. With your Z-Wave address(es) in hand, you are ready to install your Z-Wave Devices. Supported Z-Wave DevicesThe following Z-Wave Devices are supported by the Virtual Wiring System. For installation instructions and additional information, see the following sections.
Unincluding Z-Wave DevicesSometimes you need to remove a Z-Wave device from a Z-Wave network. You may want to decommission the device, or you may want to move it from one network to another. In the first case, you should "uninclude" the device. In the second case, you will have to "uninclude" the device before it can be included into another network. Unincluding a device does two things - it removes the device from the network controller's memory, and it tells the device it is not part of a network. If you have a device which refuses to be included into a network, try unincluding it first; devices which are included in one network may refuse to be included into another. If a device isn't in a controller's memory (it's a controller for a different network), the controller can still uninclude the device - any controller can uninclude a device. The procedure for unincluding devices is very similar to the procedure for including them. Put the controller into the proper mode, bring it near the device, press the include button on the device. Other than how you configure the controller, the two procedures are identical. Every controller has a simple way to put it into either include on uninclude mode. The Aeon Labs Z-Stick is put into include mode by briefly pressing its one button. The Z-Stick is put into uninclude mode by pressing its one button and holding it. When you first press the button, it will flash slowly (it's in include mode), and if you continue to hold the button, the Z-Stick wil start flashing about twice as fast (it's in uninclude mode). In both cases, you can return the controller to normal mode by pressing its one button again. Z-Wave Device Shared MethodsZ-Wave Devices are all based on a common Device, so they have shared methods. To learn more about their shared methods, click here. |
Catalina Computing, LLC.Copyright © Catalina Computing, LLC. (2013-2018) 
|
Page last updated: Mon Jan 5 20:47:04 2015 (UTC) |